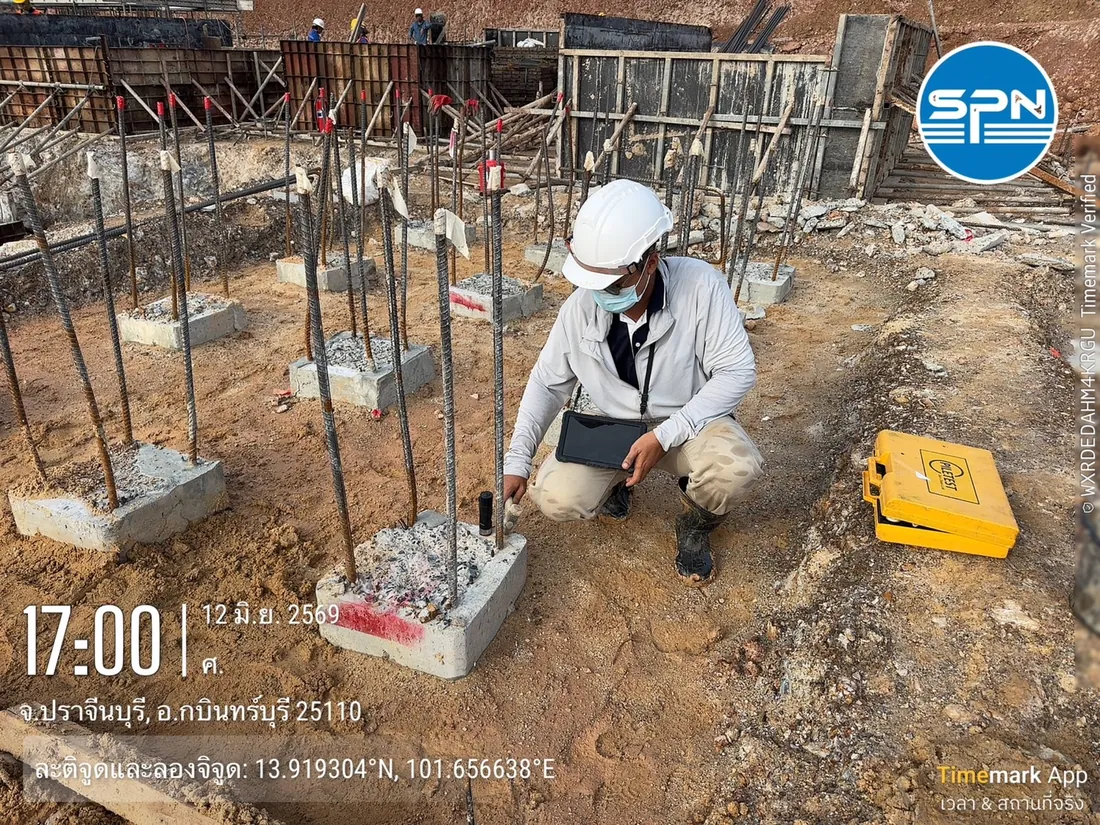
What Is a Pile Defect?
A defective pile is one with a structural flaw that reduces its load capacity or cross-section integrity below the design. The flaw may take the form of a crack, a break, a reduced section or neck (necking), a cavity or void in the concrete, or segregation of the concrete.
A defective pile may stand normally at first, but under full load or over time it risks differential settlement, with cracks propagating up into the superstructure. Finding the defect before the pile cap is cast over the pile head is the point at which it can be fixed at the lowest cost.
What Causes Pile Defects? 6 Main Causes
Pile defects fall into 6 groups of causes. Causes 1, 3 and 5 mainly affect driven piles, cause 6 affects bored piles, and causes 2 and 4 can affect both. Because the construction methods differ, the risk points and test methods differ too (see how testing differs between bored and driven piles)
1. Overdriving or Excessive Repeated Driving
Driving with energy beyond the pile's strength, or continuing to drive after the pile has reached refusal, easily causes head damage. Transverse cracks mid-shaft (tension cracks) are caused by reflected tension waves, typically while the pile toe is in soft soil with low toe resistance. If the toe suddenly strikes a hard layer or a boulder, the high compressive stress can also damage the toe.
2. Substandard Concrete
Concrete with compressive strength below specification, incorrect mix proportions or insufficient curing makes the pile brittle and prone to cracking during driving. In bored piles, concrete with poor flowability segregates and leaves voids inside the shaft. Testing a pile before the concrete is old enough therefore gives results that do not reflect reality (see minimum concrete age before testing)
3. Incomplete Welded Splices
For piles spliced by welding steel end plates, a weld that is incomplete, eccentric or below standard turns the joint into a weak point that cracks or breaks easily under load. Joints also produce a clear reflection in Seismic Integrity Test results, so a "normal joint" must be distinguished from a "crack" (see inspecting welded pile joints)
4. Soft Soil Alternating with Hard Layers or Boulders
Abrupt changes in soil layers can deflect the pile or chip the toe when it hits boulders and buried debris. In bored piles, soft soil collapsing into the borehole before concreting causes necking. This group of risks drops sharply when a soil investigation report with adequate site coverage is available from the start
5. Improper Handling, Lifting and Stacking
Lifting a pile at the wrong points (not at the pick-up points), stacking it without timber bearers, or impact during transport causes cracks even before driving, which may then propagate under actual driving forces. This group of damage is often overlooked because it happens off site.
6. Defects from Casting Bored Piles in Place
Cast-in-place bored piles are prone to voids, necking and inclusions in the concrete if concreting under drilling fluid with a tremie pipe, casing withdrawal or the support slurry level is not adequately controlled.
The diagram below brings all 6 causes into one view. Read from left to right: cause → typical damage → suitable test method. The bottom band shows the sequence used in practice: screen with Seismic first, then confirm with a more detailed method.
Which Test Detects Each Type of Pile Damage?
There are 3 main groups of methods for detecting pile defects: the Seismic Integrity Test (low strain), Cross Hole Sonic Logging (CSL) and the Dynamic Load Test (PDA), chosen according to the type of damage and the information needed. The table below helps match each symptom to a suitable test method.
← Scroll to see the full table →
| Symptom / Defect type | Suitable method | What it detects |
|---|---|---|
| Cracked, broken or necked pile; location by depth needed | Seismic Integrity Test (Low Strain) | Locates defects and estimates pile length from reflected waves |
| Voids or separation in large bored piles | Cross Hole Sonic Logging (CSL) | Checks concrete integrity between sonic tubes across the full section |
| Load capacity suspected below design criteria | Dynamic Load Test (PDA) | Measures load capacity and pile integrity during driving |
| Pile head damage visible by eye | Visual inspection + Seismic to confirm | Confirms whether damage extends below ground |
This table is a general guide. The method suited to an actual site should be chosen by the responsible engineer based on the pile type, size, depth and project-specific conditions.
Seismic Integrity Test — Whole-Pile Integrity Check, Fast and Economical
The Seismic Integrity Test (Low Strain Integrity Test) involves tapping the pile head with a hammer and measuring the reflected waves to locate defects such as cracks, necking or an abnormal pile toe. It is fast with a low cost per pile (approx. THB 100–150 per pile), so it is widely used for testing large numbers of piles. It is carried out to DPT standard 1551-51 of the Department of Public Works and Town & Country Planning.
Its limitation is that it suits piles whose length-to-diameter ratio is not too high, and it shows where a defect is but does not directly give load capacity. How to read signals and tell joints from cracks is covered in the Seismic Integrity Test result interpretation guide


Cross Hole Sonic Logging (CSL) — the Most Detailed Test for Large Bored Piles
CSL sends acoustic waves through water in sonic tubes cast into a bored pile and measures the travel time between tubes to assess concrete integrity across the full cross-section. It suits large bored piles where high confidence is required, as it offers greater resolution than the Seismic Integrity Test. Test method guidance refers to ACI PRC-228.2.
The trade-off is that sonic tubes must be planned and installed before concreting, so it cannot be applied retroactively to piles already cast. If this window is missed, the remaining options are the Seismic Integrity Test or other indirect methods. Read more about the test method in What Is Cross Hole Sonic Logging (CSL)? or see the scope of work on the pile testing service page
Dynamic Load Test (PDA) — Checks Both Capacity and Integrity
PDA (Dynamic Load Test) attaches force and acceleration sensors to the pile head during driving, then analyzes load capacity while assessing shaft condition from the Beta value (BTA). It is carried out to DPT standard 1252-51 and is suited to cases where the pile may not reach the design capacity, not merely where a crack is suspected.
Legally, PDA results can also be used in foundation calculations within the limits set by the foundation Ministerial Regulation B.E. 2566 (2023) (see legal criteria for allowable pile load), which the Seismic Integrity Test cannot do.
Approximate costs: Seismic Integrity Test THB 100–150 per pile and PDA from approx. THB 5,500 per pile, while CSL depends on pile size and quantity. Contact us for a free quotation within 24 hours. These prices exclude travel and equipment mobilization, which are charged extra according to site distance.
Each type of damage occurs at a different stage of piling work, so it is detected at a different time. The 3D view below places all 6 causes on a single site, and the right-hand panel follows the timeline of what to check at each stage and why testing should be completed before the pile cap is cast.
What to Do When a Pile Defect Is Found
When test results show a defect, the first step is for the responsible engineer to assess its severity, location by depth and effect on load capacity. Possible responses range from retesting or supplementary testing with another method, to adding piles (additional piles), to revising the foundation layout, depending on the actual data for each pile.
If the pile cap has already been cast over the pile head, testing becomes much harder. The remaining option is an indirect method such as the Parallel Seismic Test, which requires drilling a borehole beside the pile to measure the waves.
SPN does not give specific remedial design advice through articles, as decisions require site data and certification by a licensed engineer. If a pile fails testing, we recommend reading Pile Failed the Seismic Test: What Next? and then consulting the project engineer to plan the next steps.
Summary
Pile defects can arise from 6 main causes: overdriving, substandard concrete, incomplete welded splices, abrupt soil changes or boulders, improper handling and lifting, and defects from casting bored piles in place. This damage cannot be seen from outside, so testing is the essential tool — the Seismic Integrity Test for broad screening to locate defects, CSL for large bored piles with pre-installed tubes, and PDA when load capacity is also needed. See the full scope of services at pile testing services
This article provides general information on the causes of pile defects and how to detect them only. It is not engineering advice for any specific project. Damage assessment and remedial measures must be determined by a licensed engineer with complete site data.