This article focuses only on "choosing the right test method for the pile type" — not on choosing which pile to use. It walks from how each pile type is built, to the defects each typically develops, and then matches each risk to the test that addresses it. At the end there is a table matching pile types to test methods for reference.
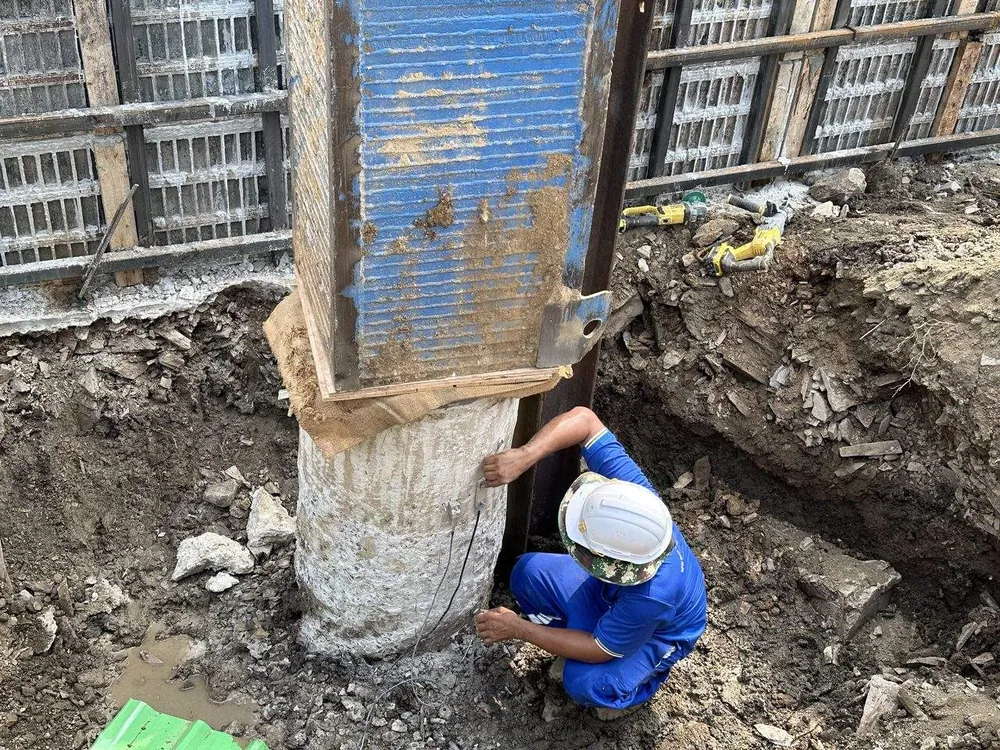
Installing test sensors on a bored pile head on site, to choose the test method that suits the pile type
Installing sensors on a bored pile head before testing — the test method chosen must match the pile type and size (Photo: SPN Soil Engineering)

Why Do Bored Piles and Driven Piles Need Different Tests?

Bored piles and driven piles need different tests because they are constructed differently, so their risks lie in different places. Driven piles are precast in a factory, so concrete quality is well controlled, but they can be damaged during lifting, transport and driving. Bored piles are cast in a hole on site, so the integrity of the concrete is the greater concern.

  • Driven pile (Driven / Precast Pile) Factory-made with consistent concrete quality. The main risks are cracking of the pile head or shaft from lifting, transport or driving; damage to the welded steel end-plate joints of piles spliced from several segments; and the toe not reaching the hard (bearing) stratum, so the capacity falls short of the requirement. Testing therefore focuses mainly on "bearing capacity", together with screening for cracks.
  • Bored pile (Bored / Cast-in-place Pile) Concrete is cast in a drilled hole. In the wet method, a steel casing and bentonite slurry support the hole wall, a reinforcement cage is lowered in, and concrete is placed through a tremie pipe. The main risks are necking, voids, segregated concrete, concrete contaminated with soil/mud, and base sediment that prevents the toe from carrying its full load. Testing therefore focuses on "concrete integrity" together with bearing capacity.

Because of these different risks, engineers choose a test method that targets the weak points of each pile type rather than using one method for every job. Read more about the causes of each defect and how to detect them in Pile defects: causes and how to detect them

The diagram below places the two pile types side by side: the top row shows the construction steps, the middle shows where the risks occur with depth (red circles), and the bottom shows the test method that matches each risk.

2D diagram comparing how driven and bored piles are built, where their risks occur with depth, and which test method checks each risk A two-panel diagram arranged left and right. The left panel is a driven or precast pile. The top row shows three construction steps: casting in a factory, where concrete quality is well controlled; lifting and transport, which carries a risk of cracking; and driving into the ground with a hammer, with segments spliced by welding. Below the steps is a section through soft clay, stiff clay and sand, with a square pile and a driving hammer above the pile head, and four red risk points from top to bottom: one, the pile head cracking from impact; two, damage to the welded steel end-plate joint; three, the shaft cracking from lifting, transport or driving; four, the toe not reaching the hard stratum so the bearing capacity falls short. The bottom summary says driven piles are tested mainly for bearing capacity, using a Seismic Integrity Test to screen for cracks at points one to three and PDA or a Dynamic Load Test to confirm the capacity at point four. The right panel is a bored or cast-in-place pile. The top row shows three construction steps: drilling the hole with a steel casing and bentonite slurry supporting the wall, lowering the reinforcement cage, and placing concrete through a tremie pipe. The section shows a bored pile in the same soil layers with four risk points: one, necking in the soft soil layer; two, concrete contaminated with soil and mud; three, voids or segregated concrete; four, base sediment that prevents the toe from carrying its full load. The bottom summary says bored piles are tested for concrete integrity together with bearing capacity, using a Seismic Integrity Test for small to medium piles, Cross Hole Sonic Logging (CSL) for large piles from about 0.80 to 1.00 meters upward, which requires tubes to be installed before concreting, and a Static Load Test or PDA to confirm capacity. The bottom strip gives three rules of thumb: driven piles use PDA with a Seismic Integrity Test; small to medium bored piles smaller than about 0.80 meters use Seismic with a Static Load Test or PDA; and large bored piles use CSL with a Static Load Test. The diagram is conceptual and not to scale. Built differently → different risks → different tests Not to scale Soft clay Stiff clay Sand Soft clay Stiff clay Sand A Driven pile (Driven / Precast Pile) Precast in a factory, then driven Factory-cast Good QC of concrete Lift · Transport Crack risk Drive Impact · Splicing 1 Head broken · cracked Impact from driving 2 Joint (welded plate) Weld damaged in driving 3 Shaft cracked From lifting, transport, driving 4 Toe short of bearing layer Capacity below requirement Focus: bearing capacity first Seismic Integrity Screen cracks, items 1–3 PDA (Dynamic Load Test) Confirm capacity, item 4 Fast, suits large pile counts B Bored pile (Bored / Cast-in-place) Drill on site, then cast in the hole Drill hole Casing · Bentonite Insert rebar Cage Pour concrete Via tremie Concrete in the hole, unseen after pour 1 Necking Soft wall squeezes section 2 Mud-mixed concrete Wall collapse into concrete 3 Void · Segregation Interrupted pour 4 Base sediment Toe can't take full load Focus: concrete integrity + capacity Seismic Integrity Small–medium · items 1–3 CSL Large ≥ ~0.80–1.00 m · tubes before pour Static Load / PDA Confirm capacity · item 4 1 Driven pile PDA + Seismic Integrity 2 Small–med bored (< ~0.80 m) Seismic + Static or PDA 3 Large bored (≥ ~0.80–1.00 m) CSL + Static Load Test
Built differently, so the risks differ — driven piles risk cracking at the head, shaft and joints and a toe that misses the bearing layer, while bored piles risk necking, soil inclusions, voids and base sediment, so the appropriate test methods differ (conceptual diagram, not to scale · Image: SPN Soil Engineering)

How Are Driven Piles Tested?

Driven piles are usually tested with a Dynamic Load Test (PDA) to assess bearing capacity and a Seismic Integrity Test to check that the pile has not been cracked or broken by driving. Both methods are fast, so they suit driven piles, which usually come in large numbers on a single project.

Dynamic Load Test (PDA) — Measuring Bearing Capacity

A Dynamic Load Test, or PDA Test, measures pile bearing capacity by dropping a ram onto the pile head and recording strain and acceleration with sensors. The analysis gives the bearing capacity and can indicate pile damage to some extent, so it is used to check the risk of the toe not reaching the hard stratum or the capacity falling short. PDA testing references DPT 1252-51 and ASTM D4945. PDA testing starts at about THB 5,500/pile and suits driven piles where capacity must be confirmed on many piles. Read more in Dynamic Load Test (PDA Test)

PDA (Dynamic Load Test): lifting the ram to drop onto the pile head to measure bearing capacity
Lifting the ram before dropping it onto the pile head in a Dynamic Load Test (PDA) (Photo: SPN Soil Engineering)

Seismic Integrity Test — Fast Integrity Screening

A Seismic Integrity Test (Low Strain) taps the pile head with a hammer and records the reflected wave to check continuity and find cracks or breaks along the pile length, including anomalies at joints. It is performed to DPT 1551-51 (method per ASTM D5882-16, withdrawn by ASTM in 2025) and costs about THB 100–150/pile. It is fast and economical, so it suits integrity screening of large numbers of driven piles — but this method does not measure bearing capacity. Read more in What is a Seismic Integrity Test?

How Are Bored Piles Tested?

Bored piles are tested with a Seismic Integrity Test for small to medium piles and Cross Hole Sonic Logging (CSL) for large bored piles, together with a Static Load Test or PDA when bearing capacity must be confirmed. Because the concrete sets in an underground hole that cannot be seen after pouring, the internal concrete needs particular attention.

Cross Hole Sonic Logging (CSL) — For Large Bored Piles

CSL sends ultrasonic pulses between access tubes that are tied to the reinforcement cage and embedded in the pile before concreting, to detect voids, discontinuities and concrete quality across the section. It follows ACI PRC-228.2 guidance (method per ASTM D6760-16, withdrawn by ASTM in 2025) and suits large-diameter bored piles of about 0.80–1.00 m and above, where a low-strain Seismic Test does not give enough detail.

The key point is that the access tubes must always be planned in advance, because CSL cannot be done retroactively once the concrete has been poured. Read more about the principle and procedure in Cross Hole Sonic Logging (CSL), or see an overview of all test methods in the pile testing methods guide

📌 A note on ASTM standard numbers

ASTM withdrew ASTM D6760-16 and ASTM D5882-16 in 2025, but many project specifications and TORs still cite both numbers. This article therefore keeps the original numbers in brackets to match the documents actually used on site. Always confirm the edition required by the project specification with the engineer of record.

Bearing Capacity — Static Load Test or PDA

When the bearing capacity of a bored pile must be confirmed, the engineer may choose a Static Load Test, which applies real load and so gives the most direct data (THB 50,000–150,000+/pile, referencing ASTM D1143 and DPT 1251), or a PDA Test, which is faster and cheaper but requires bringing in and setting up a drop weight and preparing the pile head to withstand impact. In practice, large bored piles usually get a Static Load Test when the specification demands high confidence.

Capacity testing also helps reveal base-sediment problems, which make the toe carry less load than designed.
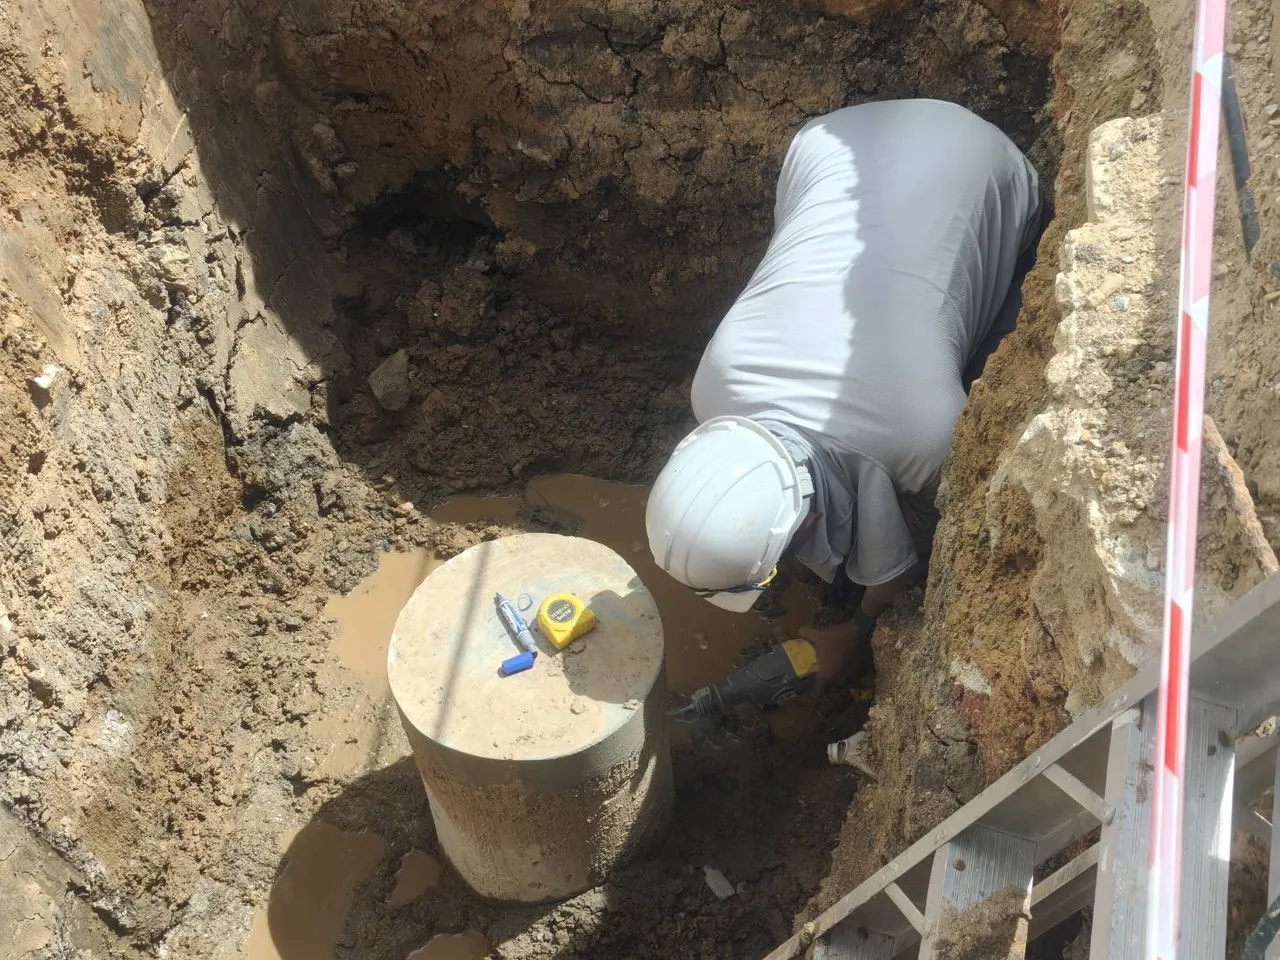
Preparing the head of a large bored pile before testing, trimming the pile head flat and level
Preparing the head of a large bored pile before testing — pile-head preparation directly affects the quality of the measured signal (Photo: SPN Soil Engineering)

The 3D view below places the two site setups side by side: on the left, driving and splicing segments; on the right, a bored pile during concreting. The numbers in the red zones correspond to the table on the right showing which method should check each risk.

3D model comparing a driven pile installation site with a bored pile during concreting, showing the risk zones created by each construction method and the test method matching each risk A conceptual 3D view of two soil blocks side by side, cut away to show soft clay, stiff clay and sand layers. The left block is a driven pile site, with a leader-type piling rig standing on the ground surface and the driving hammer held up on the leader above the pile head. The lower precast segment has already been driven and the upper segment is set on it, with a worker welding the steel joint plate above ground level. Three glowing red risk zones are shown: one, the pile head and shaft taking the hammer impact; two, the welded steel plate joint; three, the toe that may not reach the bearing layer. The right block is a wet-method bored pile site cut in half to show the inside of the hole, with a steel casing at the top, bentonite slurry filling the hole to near the top of the casing, the reinforcement cage lowered to the base, two CSL tubes tied to the cage and protruding above the hole, and a tremie pipe with a concrete hopper in the center of the hole. Fresh concrete is placed from the base upward, displacing the slurry, and a bentonite tank with a hose stands behind. Three red risk zones are shown: four, necking below the casing tip in the soft soil layer; five, the concrete–slurry interface where mud-contaminated concrete or voids may form; six, base sediment. The panel on the right, titled Test to match the risk, pairs driven pile items one and two with screening by Seismic Integrity Test and item three with confirmation by PDA or a Dynamic Load Test; bored pile items four and five are checked with a Seismic Integrity Test for small to medium piles or CSL for large piles from about 0.80 to 1.00 meters; item six is confirmed with a Static Load Test or PDA. A warning box states that CSL tubes must be tied to the cage before concreting because the test cannot be done afterwards. Not to scale. 3D model: how it is built, where the risks are, what to test with Not to scale Hammer Held on leader Weld joint Segment end plates CSL tube Tied pre-pour Tremie + hopper Pour from the base Casing Casing Bentonite slurry Supports wall Fresh concrete Pushes slurry up 1 2 3 4 5 6 A · Driven pile B · Wet-method bored pile (during pour) Red zone = risk · numbers match table at right Test to match the risk A · Driven pile 1 2 Head · Shaft · Joint → Seismic Integrity Fast crack screening, many piles 3 Toe short of bearing layer → PDA (Dynamic Load Test) Confirm bearing capacity B · Bored pile 4 5 Necking · Soil · Voids → Seismic Integrity (small–med) → CSL (large ≥ ~0.80–1.00 m) Checks concrete in the section 6 Base sediment → Static Load Test or PDA Confirms actual capacity CSL tubes must be tied to cage always before concreting No CSL possible after pour Conceptual, not a construction drawing Actual tests set by engineer of record
3D model: risk zones of a driven pile during driving and splicing compared with a wet-method bored pile during concreting, with the test method matching each point (conceptual image, not to scale · Image: SPN Soil Engineering)

Which Test Method Suits Each Pile Type?

In general, driven piles use a Seismic Integrity Test with PDA; small to medium bored piles use a Seismic Integrity Test with a Static Load Test or PDA; and large bored piles use CSL with a Static Load Test. The table below summarizes this with the reference standards.

← Scroll to see the full table →

Matching pile types to test methods and reference standards
Pile typeIntegrity checkCapacity checkMain standards
Driven pile (Precast/Spun)Seismic Integrity TestPDA (Dynamic Load Test)DPT 1551-51 / DPT 1252-51
Small–medium bored pile (< ~0.80 m)Seismic Integrity TestStatic Load Test or PDADPT 1551-51 / ASTM D1143
Large bored pile (≥ ~0.80–1.00 m)Cross Hole Sonic Logging (CSL)Static Load TestACI PRC-228.2 (D6760-16 withdrawn 2025) / ASTM D1143

This table is general guidance. The actual choice of test method and number of piles to test depends on the project specification and the judgment of the engineer of record. If you are still unsure which pile type suits your project, see the comparison in How to choose a pile — driven vs bored vs spun pile, and see how many piles need testing in How many piles should be tested?

How Much Does Each Pile Test Cost?

Starting prices per pile are: Seismic Integrity Test about THB 100–150/pile, PDA from about THB 5,500/pile, and Static Load Test THB 50,000–150,000+/pile. Actual prices depend on pile type and size, the number of piles and the distance to site. For CSL and jobs with special conditions, contact us for a free quotation within 24 hours.

See details of all SPN pile testing services on the pile testing services page

📌 A note on pricing

This price excludes travel and equipment mobilization costs, which are charged extra depending on the distance to site.