
What is Technical Due Diligence?
Technical Due Diligence (TDD) is an assessment of a building's technical condition to support a decision to buy, lease or invest. The goal is to reduce uncertainty before any money leaves your pocket. Unlike a general home inspection, which focuses on architectural finishes and building services, TDD goes deep into the structure's load-carrying capacity and the risk of future repairs.
← Scroll to see the full table →
| Issue | Home inspection / general handover check | Technical Due Diligence |
|---|---|---|
| Purpose | Find defects in finishes and building services | Assess structural risk and repair budget before deciding |
| Scope | Finishes, paint, leaks, doors and windows, electrical, plumbing | Columns, beams, slabs, foundations, piles, concrete strength, settlement |
| Equipment | Visual inspection and basic tools | NDT equipment per ASTM standards and actual load testing |
| Result | Punch list of finishing defects | Report certified by a licensed civil engineer (COE), with signature, license number and usage limitations |
| Usable in price negotiation | To a limited extent | Yes, because it is backed by numerical evidence |
Why inspect before signing the contract?
Because risks you cannot see with the naked eye become the buyer's or tenant's burden the moment the contract is signed. The 5 most common risks are:
- The building was designed for a different purpose — a warehouse designed for light storage, but the new tenant plans tall multi-level racking or heavy forklifts
- No construction drawings or original test records — rebar sizes, pile depths and the design concrete strength are unknown
- Past additions or alterations without engineer certification — added mezzanines, cored slabs, beams cut for pipe runs, or extensions built without calculations
- Differential settlement — common in the soft clay areas of Bangkok and its vicinity, especially where an extension sits on a different foundation system from the main building
- Deteriorated concrete and corroded reinforcement — common in seaside buildings, factories handling chemicals, and buildings with years of water leakage
The cost of an inspection is a one-time expense before you decide, whereas the cost of structural strengthening discovered later can no longer be negotiated. Inspecting first keeps all three options open: buy, negotiate, or walk away.
How many steps does the inspection involve?
A complete Technical Due Diligence usually has 5 steps: document collection, site survey, non-destructive testing, proof of actual strength, and the engineer's report. The results of each step define the scope of the next — it is not a matter of testing everything at once from day one.
What should be inspected? A 6-category checklist
A scope comprehensive enough to support a decision should answer questions in all 6 categories, from documents to settlement, as shown in the table.
← Scroll to see the full table →
| Category | Questions that must be answered | Common methods |
|---|---|---|
| 1. Documents and drawings | Are as-built drawings, permits and structural calculations available? What alterations has the building undergone? | Document review, owner interview |
| 2. Visible structure | Are there cracks that indicate structural problems? Are columns or beams deformed, or is concrete spalled with exposed rebar? | Visual survey, photos and location plan |
| 3. Concrete strength and reinforcement | Is the concrete strength close to the design value? How is the rebar placed, is the cover adequate, and has it started to corrode? | Rebound Hammer (ASTM C805), UPV (ASTM C597), Rebar Scan, Half-Cell (ASTM C876), Core Test (ASTM C42/C39) |
| 4. Foundations and piles | What pile system was used, how long are the piles, are they damaged, and does the data match the drawings? | Parallel Seismic (ASTM D8381), GPR (ASTM D6432), additional soil investigation where needed |
| 5. Floor load capacity | Can the floor really carry the new service loads, especially warehouse floors that will carry racking or machinery? | Floor Load Test, Rebar Scan, review of structural calculations |
| 6. Settlement | Is the building settling differentially? Is settlement still ongoing or has it stopped? | Level survey, installing monitoring points and tracking over time |
The right scope depends on the deal value, the building's age and the planned new use. A fairly new office building with complete drawings and no change of use may need only categories 1–3, whereas an old warehouse being converted into heavy-duty storage should be inspected in all 6 categories.

Which test methods are used, and which standards apply?
Most test methods in this work are non-destructive (Non-Destructive Testing), so they can be carried out while the building is in use without disturbing existing tenants. Methods that take samples or apply real loads are used only where necessary.
← Scroll to see the full table →
| Method | Standard | What it answers | Impact on structure |
|---|---|---|---|
| Rebound Hammer | ASTM C805 | Assess concrete surface hardness and compare uniformity between members | Non-destructive |
| Ultrasonic Pulse Velocity (UPV) | ASTM C597 | Check internal uniformity of the concrete and locate voids or internal cracks | Non-destructive |
| Rebar Scanner / Cover Meter | BS 1881-204 | Locate rebar and determine spacing and concrete cover | Non-destructive |
| Half-Cell Potential | ASTM C876 | Assess the probability of active rebar corrosion | Non-destructive |
| Carbonation Test | EN 14630 / RILEM CPC-18 | Measure the depth at which concrete has lost the alkalinity that protects the rebar | Minor surface drilling |
| Ground Penetrating Radar (GPR) | ASTM D6432 | Detect embedded objects under slabs and underground, slab thickness, pipe locations | Non-destructive |
| Parallel Seismic | ASTM D8381 | Estimate pile length under a completed building | Requires a reference borehole |
| Core Test | ASTM C42/C39 | Measure actual concrete compressive strength from cored samples | Localized destructive |
| Floor Load Test | ACI 318-19 Chapter 27 | Prove that the floor can carry the specified load without damage | Real load applied |
| Pull-Out Test (chemical anchors) | ASTM E488 | Check the holding capacity of bolts and anchors installed in the existing structure | Localized testing |
For more on choosing a method, see NDT: non-destructive testing of concrete structures and NDT vs Core Test: what's the difference?

Which documents should you request from the owner before the inspection?
Request 8 documents, starting with the as-built drawings and structural calculations. The more complete the documents, the smaller and cheaper the on-site testing scope becomes.
- As-built drawings, especially the structural and foundation drawings
- Structural calculations and the design live load for each floor
- Building permit and alteration permit (if there have been additions)
- Soil investigation report from the original project
- Previous pile test results, such as Seismic Integrity Test or Dynamic Load Test reports
- Concrete compressive strength test results from construction
- History of repairs, strengthening, and any flood or fire events
- Annual building inspection reports under the Building Control Act (for buildings that fall under it)
This is common with warehouses and old buildings. Treat the structural information as zero and rebuild it entirely through on-site testing, which makes the scope and budget higher than usual. Allow for this time and budget from the negotiation stage.
Which warning signs mean you should stop and investigate further? (7 signs)
The following 7 signs do not mean the building is unusable, but they do mean you need more information before deciding.
- Diagonal cracks at column heads or beam ends — unlike map cracking in plaster, these are directly related to forces in the structure
- Floors or doors clearly out of level — possibly caused by differential settlement
- Concrete spalled enough to expose corroded rebar — the steel cross-section is reduced, and so is the load capacity
- Gaps between the main building and an extension — indicating the two parts are settling unequally
- Slabs cored or beams cut to route building services — especially without engineer certification
- Mezzanines or storage levels added later — can easily exceed the original design load
- The owner refuses access to certain areas — a management red flag that deserves as much caution as the technical ones
If the building is old or has been altered several times, see Structural assessment of old buildings before renovation, and if the main concern is the foundations, see Pile inspection before buying a building
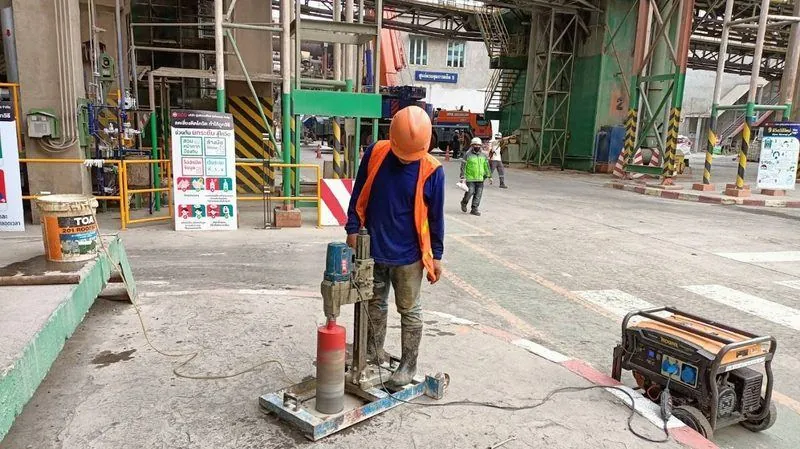
What extra checks do warehouses and factories need?
Warehouses and factories need special attention to floor load capacity, because service loads are high and concentrated at points. Compared with office buildings, there are 5 additional items to check:
- How much the floor can really carry — racking transfers load to the floor as point loads through base plates, not as a uniformly distributed load, so the figure in marketing documents is usually not enough to base a decision on
- Slab on ground or pile-supported slab — a slab on ground in soft-soil areas is likely to settle over time, unlike a slab that transfers load directly to piles
- Forklift and truck routes — wheel loads and repeated impact damage the floor faster than in static storage areas
- Floor flatness — critical for high-bay racking or narrow-aisle forklifts
- Steel roof structure and connections — especially if building services, fire-protection piping or crane rails will be hung from it
For more on floors and how to prove their capacity, see How much load can a factory or warehouse floor carry, and how to prove it
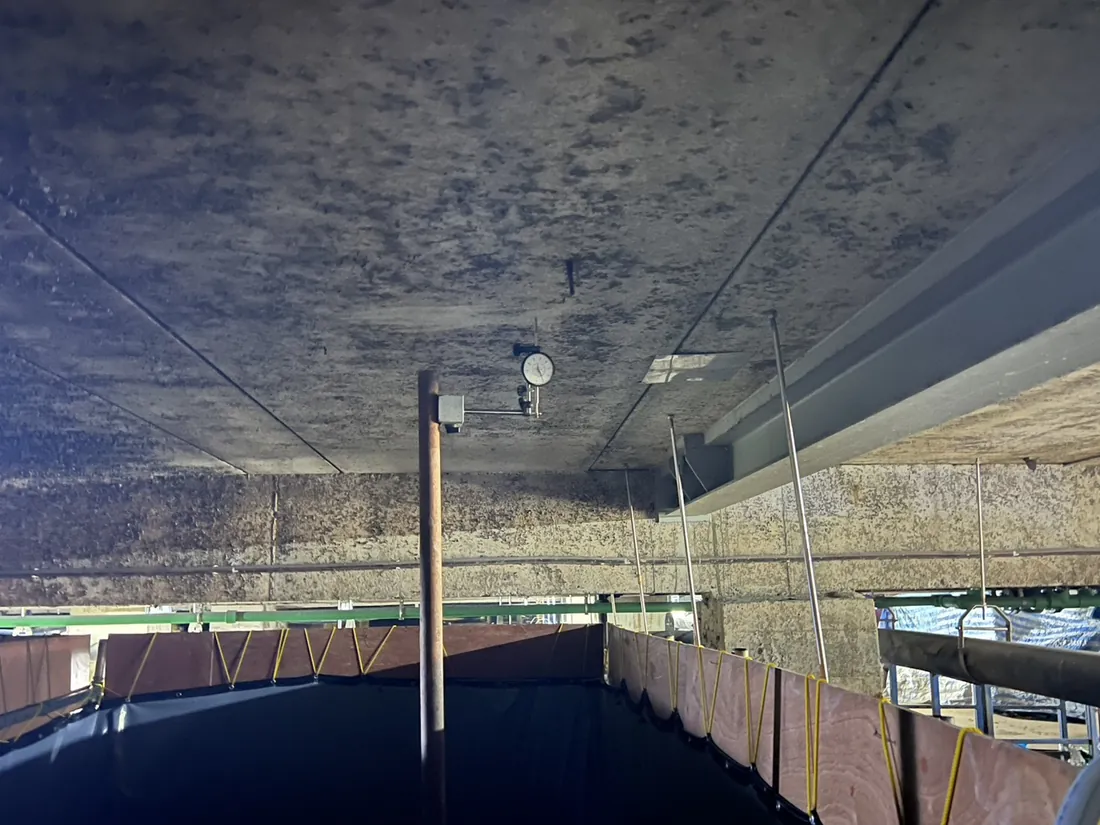
How long does the inspection take?
Typically, site work takes 1–2 days per building and the final report about 7–14 working days, depending on the scope. Build this time frame into your negotiation schedule from the start.
If the deal has a tight signing deadline, start with steps 1–3 to get an overview of the risks, then write contract conditions that cover the step 4 test results that will follow later.
How much does it cost?
Cost depends on the methods used, the number of test points, access difficulty and site distance; it is not a lump-sum price per square meter of building. The table below compares relative price levels to give you a picture before requesting a quote.
← Scroll to see the full table →
| Package | Best for | Includes | Price level |
|---|---|---|---|
| Initial screening | Building with complete drawings, continuing the same use | Visual survey + Rebound Hammer + Rebar Scan | 💰 |
| Pre-purchase or pre-lease | General buildings needing enough data to make a decision | Screening package + UPV + Half-Cell + level survey | 💰💰 |
| Strength proof | Change of use, added loads, or warning signs found | Pre-purchase package + Core Test + Floor Load Test + Parallel Seismic as needed | 💰💰💰 |
The 💰 levels above are only a relative comparison between packages, not a service price list. For a detailed pricing breakdown see Structural inspection NDT prices 2026, or send us your scope to get a free quotation within 24 hours.
Price note: This price excludes travel and equipment mobilization costs, which are charged extra depending on the distance to site.
How can you use the results in negotiations?
Use them as numerical evidence to adjust the price, set conditions, or limit use in the contract. A report certified by an engineer carries weight in negotiations because it turns subjective concerns into numbers that can be discussed. There are 4 practical approaches:
- Adjust the price by the estimated repair budget — use the estimated strengthening or repair cost as the basis for negotiation
- Require the seller to carry out repairs before transfer — define the repair scope and acceptance criteria clearly in the contract
- Write usage limitations into the lease — such as the maximum floor load for each zone, to prevent later disputes
- Hold back part of the payment (retention) — until the remaining test results are complete
Summary
A pre-purchase or pre-lease structural inspection is not about finding fault with the building, but about knowing what you are paying for and how far the building can support your planned use. There are 3 key points:
- Consider all 6 categories, then choose the scope based on building age, deal value and the new use
- Obtain as many existing documents as possible to reduce on-site testing scope
- Have the responsible engineer set the test layout for the intended new use, rather than following an off-the-shelf checklist