After an earthquake, a building owner's first question is "Can we go back in?" The answer comes from a step-by-step inspection. This article explains what each tag color means, the inspection steps, what to look at on site, and the tests used when a detailed evaluation is needed.
What Do Green, Yellow and Red Tags Mean?
The colored tag is the result of the rapid evaluation and shows how far the building may be occupied: green means it may be occupied, yellow means restricted use, and red means entry is prohibited. The system was developed from the US ATC-20 guidelines and is widely used for post-earthquake building inspection. In Thailand, the Department of Public Works and Town & Country Planning has a standard for assessing the structural stability of buildings after disasters (DPT standard 1902-62) that follows the same approach.
Official posting of inspection tags is the authority of local building officials or engineers appointed by the responsible agency. Private engineers carry out in-depth assessments that serve as supporting information for decision-making.
← Scroll to see the full table →
| Signboards | Meaning | Observed conditions | Next actions |
|---|---|---|---|
| 🟢 Green — may be occupied | No damage affecting stability | Minor cracks in masonry walls or plaster; no damage found in columns, beams or slabs | Normal use; repair surfaces at convenience |
| 🟡 Yellow — restricted use | Damage needing further assessment, or risk limited to certain areas | Clear cracks in load-carrying members, local concrete spalling, finishes at risk of falling | Restrict access to damaged areas and have an engineer carry out a detailed evaluation |
| 🔴 Red — entry prohibited | Risk of failure or collapse | Severe column or beam damage, building tilting, visible floor sagging, partial structural collapse | Do not enter, cordon off the surrounding area, and have an engineer assess urgently |
A green tag means "no damage affecting stability was found by visual inspection at that time." Damage inside the concrete, or at joints hidden behind finishes, may only be found with additional testing. If the building went through a strong earthquake or shows anything unusual afterward, a detailed evaluation should be carried out even with a green tag.
What Are the Steps in a Post-Earthquake Building Inspection?
A post-earthquake building inspection has 5 steps: assessment from outside, rapid visual evaluation, tagging, detailed evaluation, and a conclusion on repairs. They are carried out in order to screen large numbers of buildings quickly first, and then go in depth only on buildings that still cannot be concluded.
- Assess safety from outside before entering the building — walk around the building to check for elements at risk of falling, tilting of the building, or separation of the ground around it. If clear signs of failure are seen, cordon off the area and do not enter.
- Rapid visual evaluation — walk through every floor to inspect the main load-carrying members and record the location and nature of damage. This typically takes about 30 minutes to 2 hours per building, depending on size.
- Classify and post the inspection tag — conclude green, yellow or red, clearly stating the reasons and any restrictions on use.
- Detailed evaluation — for yellow- or red-tagged buildings, use non-destructive testing, concrete core sampling and foundation investigation as needed to assess the remaining strength.
- Conclude the repair and strengthening approach — the responsible engineer summarizes the results in a report, with the repair or strengthening approach and the conditions for re-occupancy.
During steps 2 to 4, supporting information should also be collected: the original construction drawings, year of construction, history of alterations, and soil investigation reports if available. Buildings constructed before seismic design requirements existed often have joint reinforcement details that differ from new buildings, which directly affects the assessment.
Which Parts of the Building Need to Be Checked?
Check the load-carrying and load-transferring members first: columns, beams, beam-column joints and shear walls, because damage at these points directly affects stability. There are 7 groups of items to inspect.
- Columns — the most important point. Look for diagonal cracks, horizontal cracks at the column base and top, spalled concrete exposing reinforcement, and opened-up ties, which signal that the column has been loaded beyond its capacity.
- Beams — look for diagonal cracks near the beam ends where they meet columns, and vertical cracks on the beam soffit at midspan.
- Beam-column joints — these areas carry reversing forces during an earthquake. Damage here is considered severe because it is hard to repair and affects overall stability.
- Shear walls and lift cores — look for diagonal or X-shaped cracks, the characteristic pattern of reversing lateral loads.
- Floors and stairs — look for gaps between floors and walls, floor sagging, and cracks at the base of stairs. Stairs are the escape route, so they need special assessment.
- Foundations and surrounding ground — look for building tilt, ground around the building settling away from it, and ground cracks, which may be related to loss of soil strength.
- Non-structural elements at risk of falling — masonry walls separated from the structure, ceilings, glass, signs, and building services hung below the ceiling.

How to Read Cracks After an Earthquake
Start by separating new cracks from existing ones, then look at the direction and location of each crack. Cracks that appear immediately after an earthquake carry more weight in the assessment than existing cracks. New cracks usually have sharp, clean faces with no accumulated dust or water staining, while old cracks usually have rounded edges and collected dust.
The patterns that deserve the highest priority after an earthquake are diagonal and X-shaped cracks in columns, shear walls and beam-column joints, because they reflect reversing shear forces from the shaking. Stepped cracks in masonry walls can indicate either structural movement or foundation settlement.
After the first inspection, a crack map should be made and movement monitored continuously, because aftershocks may worsen the damage. Details on reading and monitoring cracks are in Which Structural Cracks Are Dangerous?
Which Tests Are Used in a Detailed Evaluation?
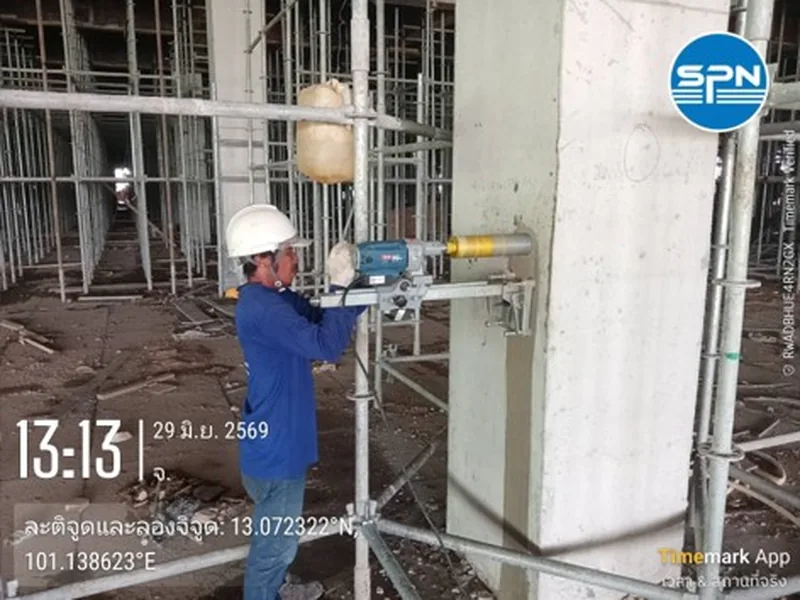
A detailed evaluation starts with non-destructive testing such as UPV and rebar scanning, followed by concrete coring only where necessary, with each method chosen according to the question that needs answering. Read about the selection principles in NDT vs Core Test: Which to Use
← Scroll to see the full table →
| Question | Test method | Reference standards |
|---|---|---|
| Is the concrete still uniform, or are there internal voids and cracks? | Ultrasonic Pulse Velocity (UPV) | ASTM C597 |
| Does the surface hardness of damaged concrete differ from undamaged areas? | Rebound Hammer (screening) | ASTM C805 |
| What is the actual remaining compressive strength of the concrete? | Core Test (core sampling) | ASTM C42 |
| How are the reinforcement and ties arranged, and is the cover adequate? | Rebar Scanner / GPR | BS 1881-204 (cover meter) / ASTM D6432 (GPR) |
| How deep are the existing foundations when there are no construction drawings? | Parallel Seismic Test | ASTM D8381 |
| Have the soil layers under the building changed after the event? | Soil investigation and laboratory testing | ASTM D1586 (SPT) |
For buildings where the load capacity of existing piles must be assessed, the dynamic load test (Dynamic Load Test, PDA) to ASTM D4945 and DPT standard 1252-51, and the pile integrity test (Seismic Integrity Test) to DPT standard 1551-51 can be used as supporting tools. The choice depends on site conditions and whether the pile heads can be accessed.

How Should the Building Be Repaired or Strengthened After Inspection?
Repair approaches fall into 3 groups: surface repair, strength-restoring repair, and strengthening, depending on the level of damage and the assessed remaining strength.
- Surface and durability repair — for minor cracks that do not affect strength, e.g. sealing cracks with epoxy materials, repairing spalled concrete and protecting reinforcement against corrosion.
- Strength-restoring repair — for members that are damaged but still serviceable, e.g. epoxy injection into cracks or repair with non-shrink mortar.
- Strengthening — when the remaining strength is insufficient, e.g. jacketing columns with concrete or steel, strengthening with carbon fiber sheets (FRP), or adding shear walls.
Assessment of the structural stability of buildings after disasters in Thailand refers to DPT standard 1902-62 by the Department of Public Works and Town & Country Planning, while seismic strengthening design refers to DPT standard 1301/1302-61, the standard for seismic-resistant building design. Building-specific repairs must be specified by the responsible engineer from actual inspection results and cannot be reduced to a formula.
What Are the Costs and Timeline?
Post-earthquake building inspection fees depend on building size, number of stories, level of damage and the tests required in the detailed evaluation, so there is no fixed lump-sum price. Contact us for a free quotation within 24 hours. Itemized prices for structural testing are listed in Structural Testing Prices 2026
As for duration, a rapid evaluation of a small to medium building usually takes about 30 minutes to 2 hours per building, while a detailed evaluation with testing and core sampling usually takes 1–3 days on site, plus some time waiting for laboratory results before the final report is issued.
Price note: This price excludes travel and equipment mobilization costs, which are charged extra depending on the distance to site.
Summary
Post-earthquake building inspection is done at two levels: a rapid evaluation to classify the building as green, yellow or red, followed by a detailed evaluation only for yellow- and red-tagged buildings. The first places to check are columns, beam-column joints and shear walls, with diagonal and X-shaped cracks being the warning signs that deserve the highest priority.
SPN Soil Engineering provides inspection and non-destructive structural testing, concrete core sampling and existing foundation investigation, with reports certified by a licensed civil engineer (COE), signed and with registration number. Contact us for a free quotation within 24 hours.